Databricks User Guide
You can run BigDL program on the Databricks cluster as follows.
1. Create a Databricks Cluster
Create either an AWS Databricks workspace or an Azure Databricks workspace.
Create a Databricks cluster using the UI. Choose Databricks runtime version. This guide is tested on Runtime 9.1 LTS (includes Apache Spark 3.1.2, Scala 2.12).
2. Download BigDL Libraries
Download the BigDL package from here, scroll down to the bottom, choose the latest release bigdl-assembly-spark_3.1.2-2.1.0-*-fat-jars.zip.
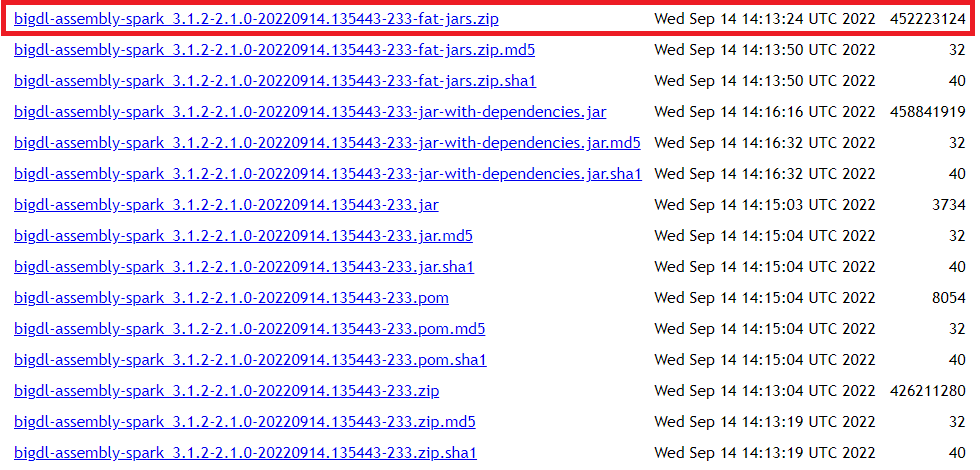
Unzip the zip file, we only need two files:
jars/bigdl-assembly-spark_3.1.2-2.1.0-SNAPSHOT-jar-with-dependencies.jar
python/bigdl-spark_3.1.2-2.1.0-SNAPSHOT-python-api.zip
3. Install BigDL Java dependencies
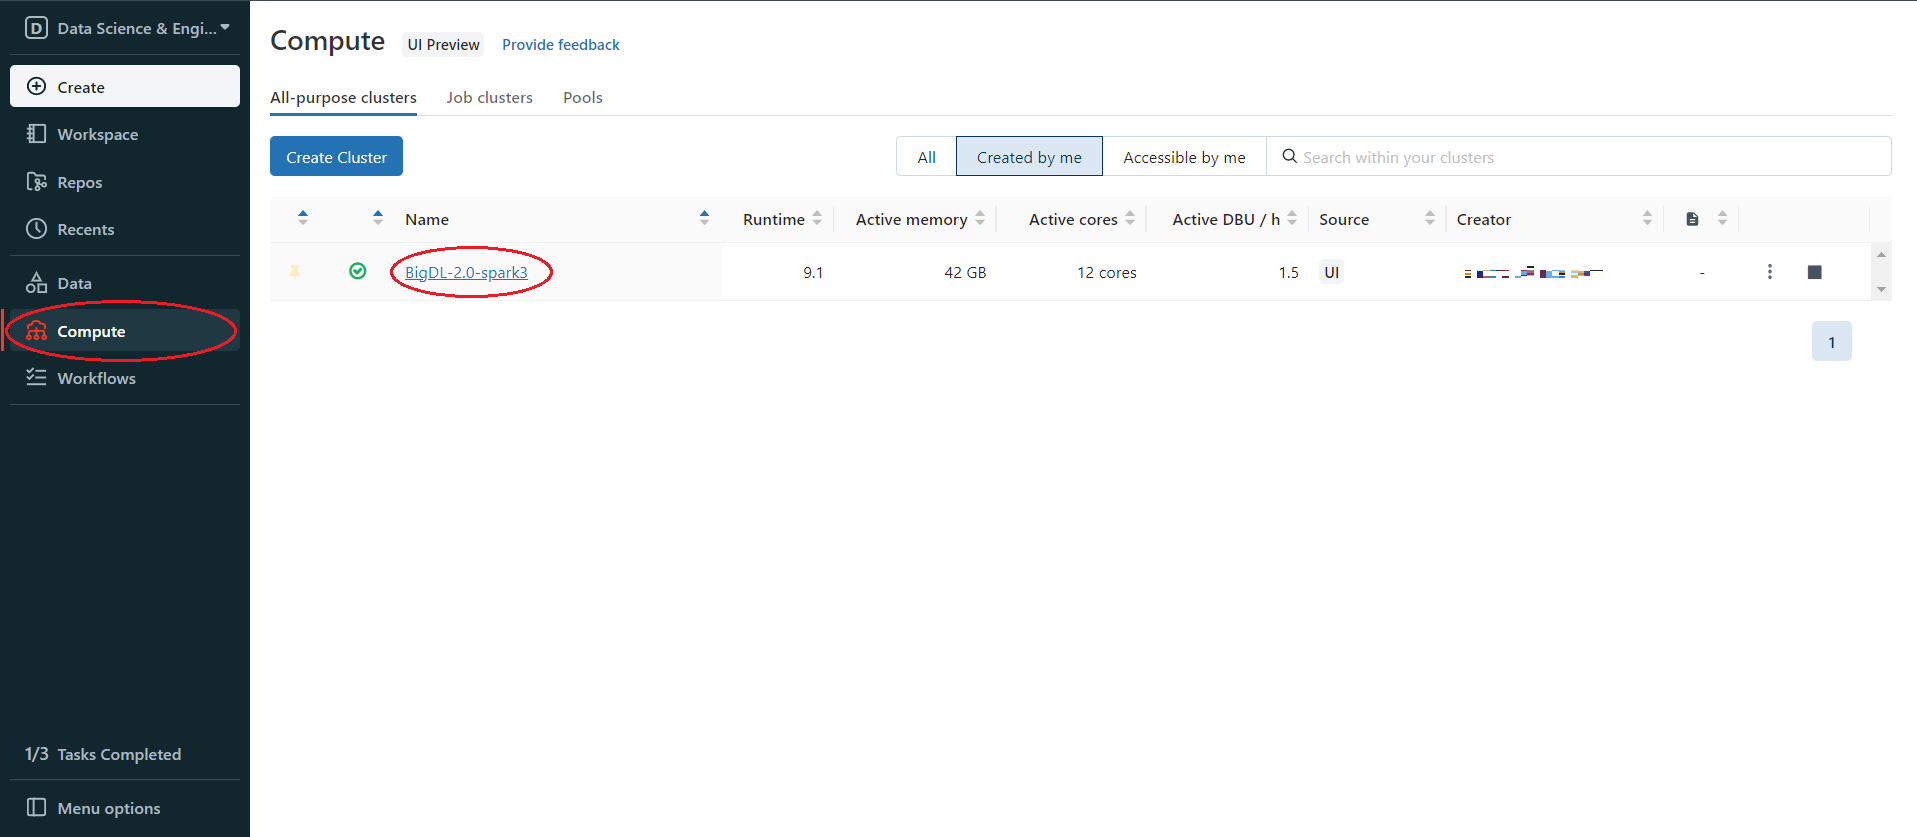
In the Databricks left panel, click Compute and select your cluster.
Install BigDL java packages using bigdl-assembly-spark_3.1.2-2.1.0-SNAPSHOT-jar-with-dependencies.jar from step 2. Click Libraries > Install New > Library Source(Upload) > Library Type (Jar). Drop the jar on Databricks.
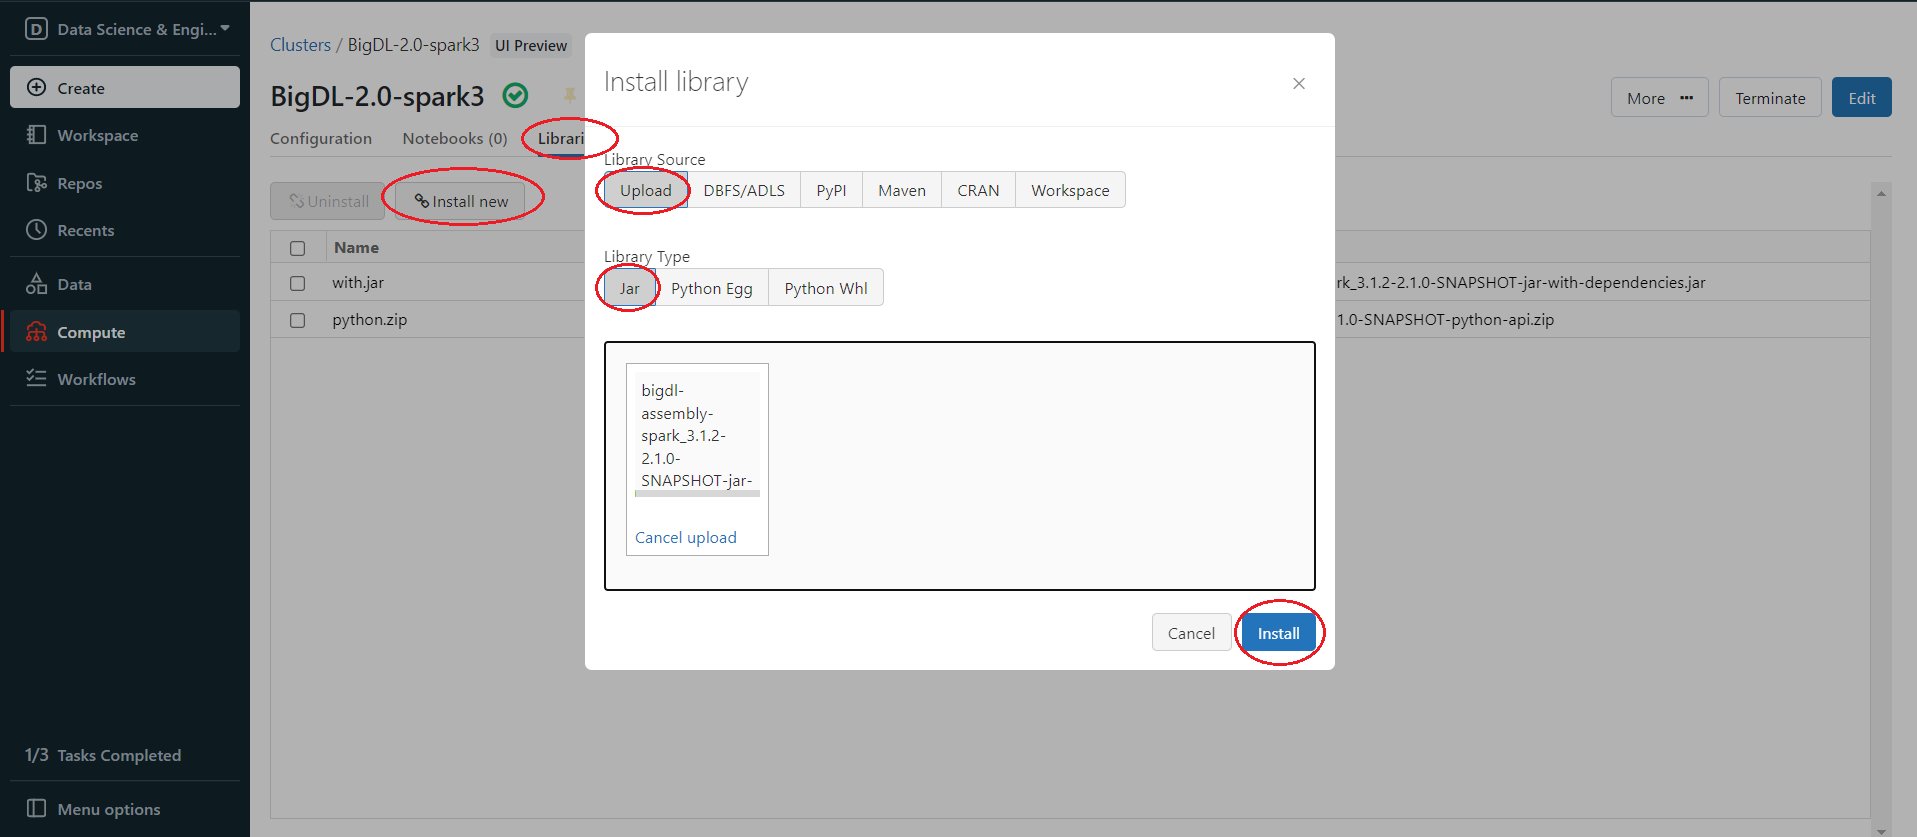
After upload finishes, click Install.
Tips: if you find your upload process is really slow, try to use Databricks CLI to upload, see Appendix B for details.
4. Install BigDL Python libraries
Install BigDL python environment using bigdl-spark_3.1.2-2.1.0-SNAPSHOT-python-api.zip from step 2. However, Databricks can only upload Jar, Python Egg and Python Whl, but doesn’t support Zip, so we can not simply upload the python api zip and install it like what we do in step 3. You can upload and install the zip package in one of the following ways.
4.1 Upload and Install through DBFS
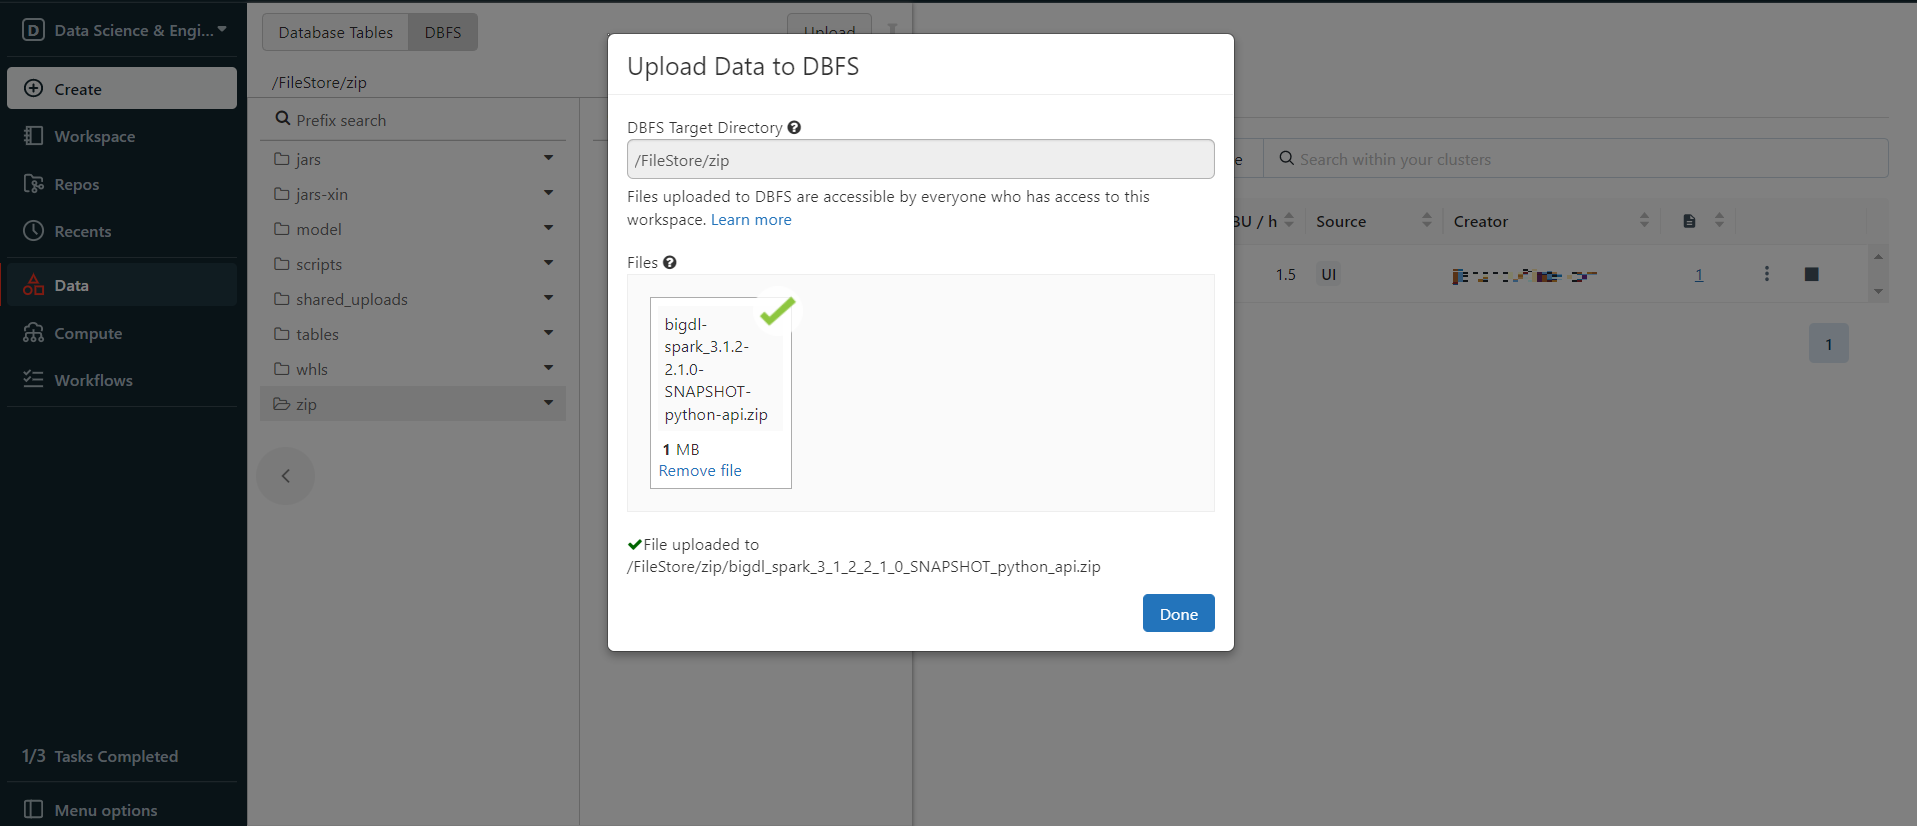
First, upload the zip package to DBFS. In the left panel, click Data > DBFS, if your panel don’t have DBFS, see Appendix A. then choose or create a folder and right click in the folder, choose Upload here.
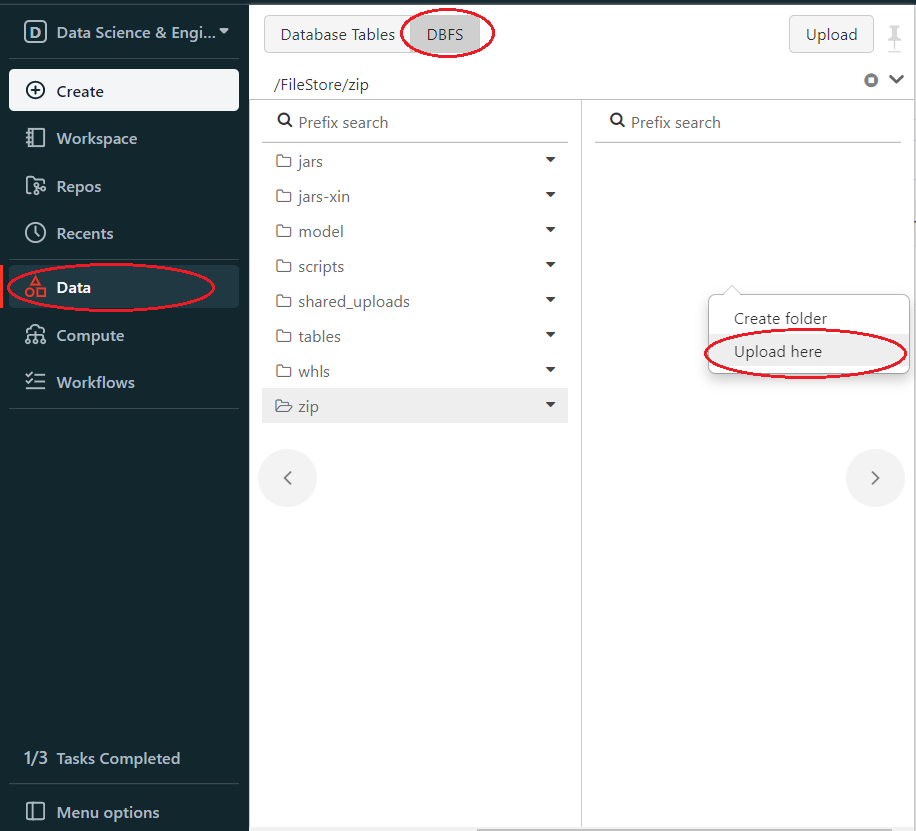
Upload your zip package.
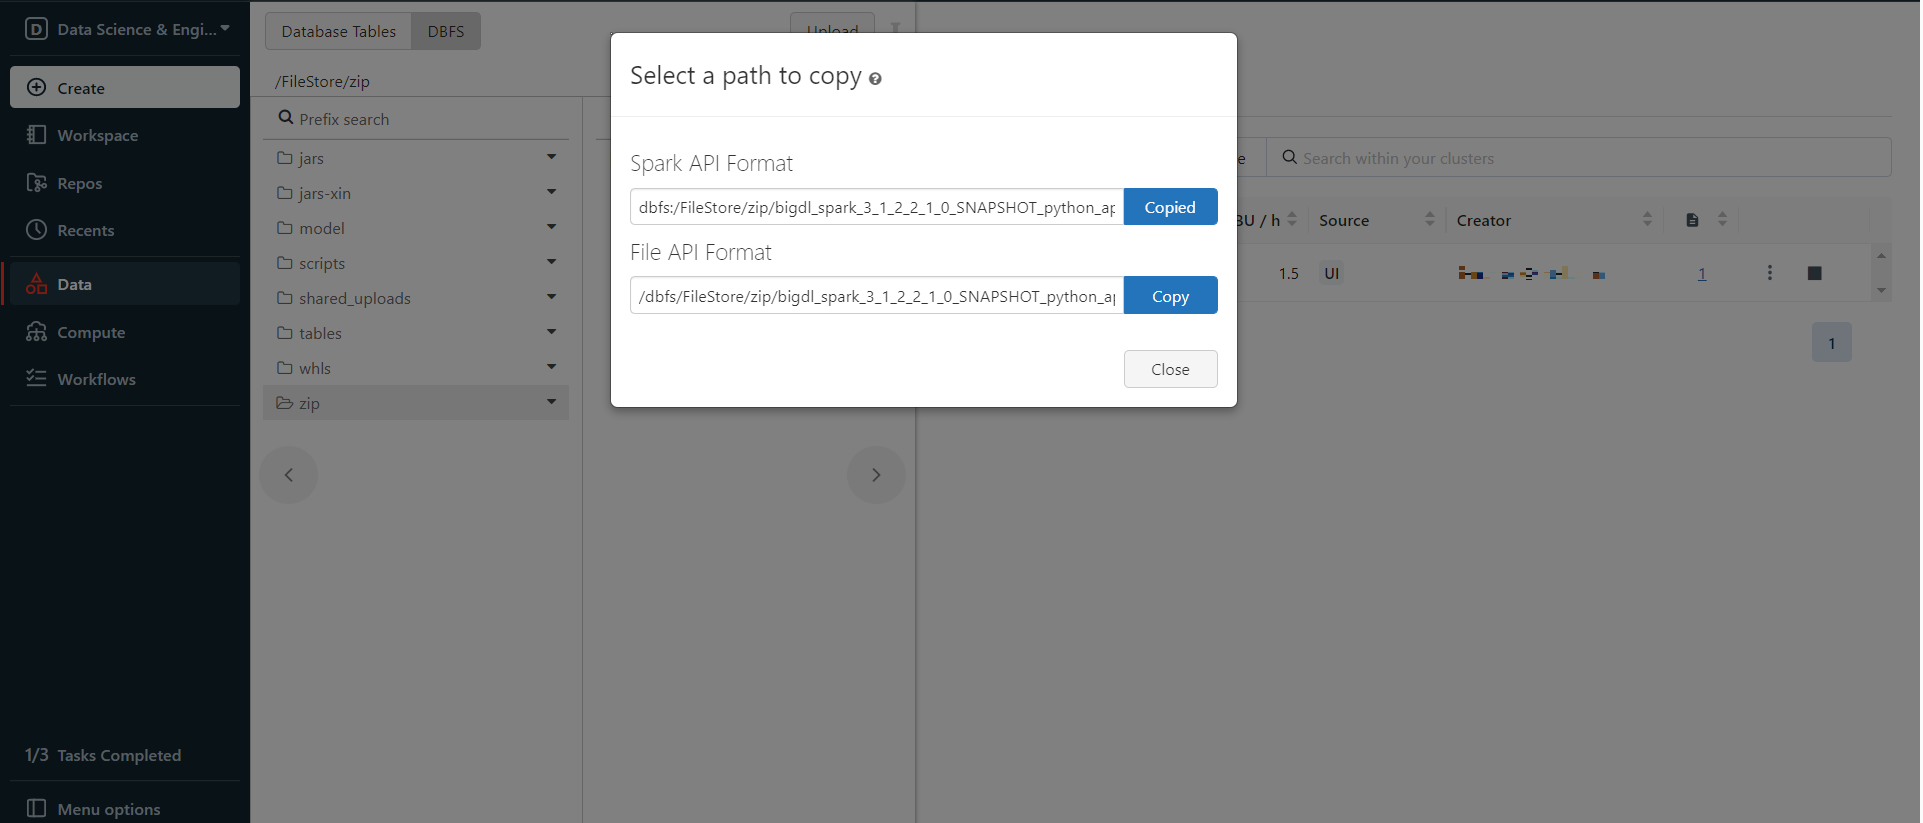
Right click the uploaded zip package and choose Copy path, copy the Spark API Format path.
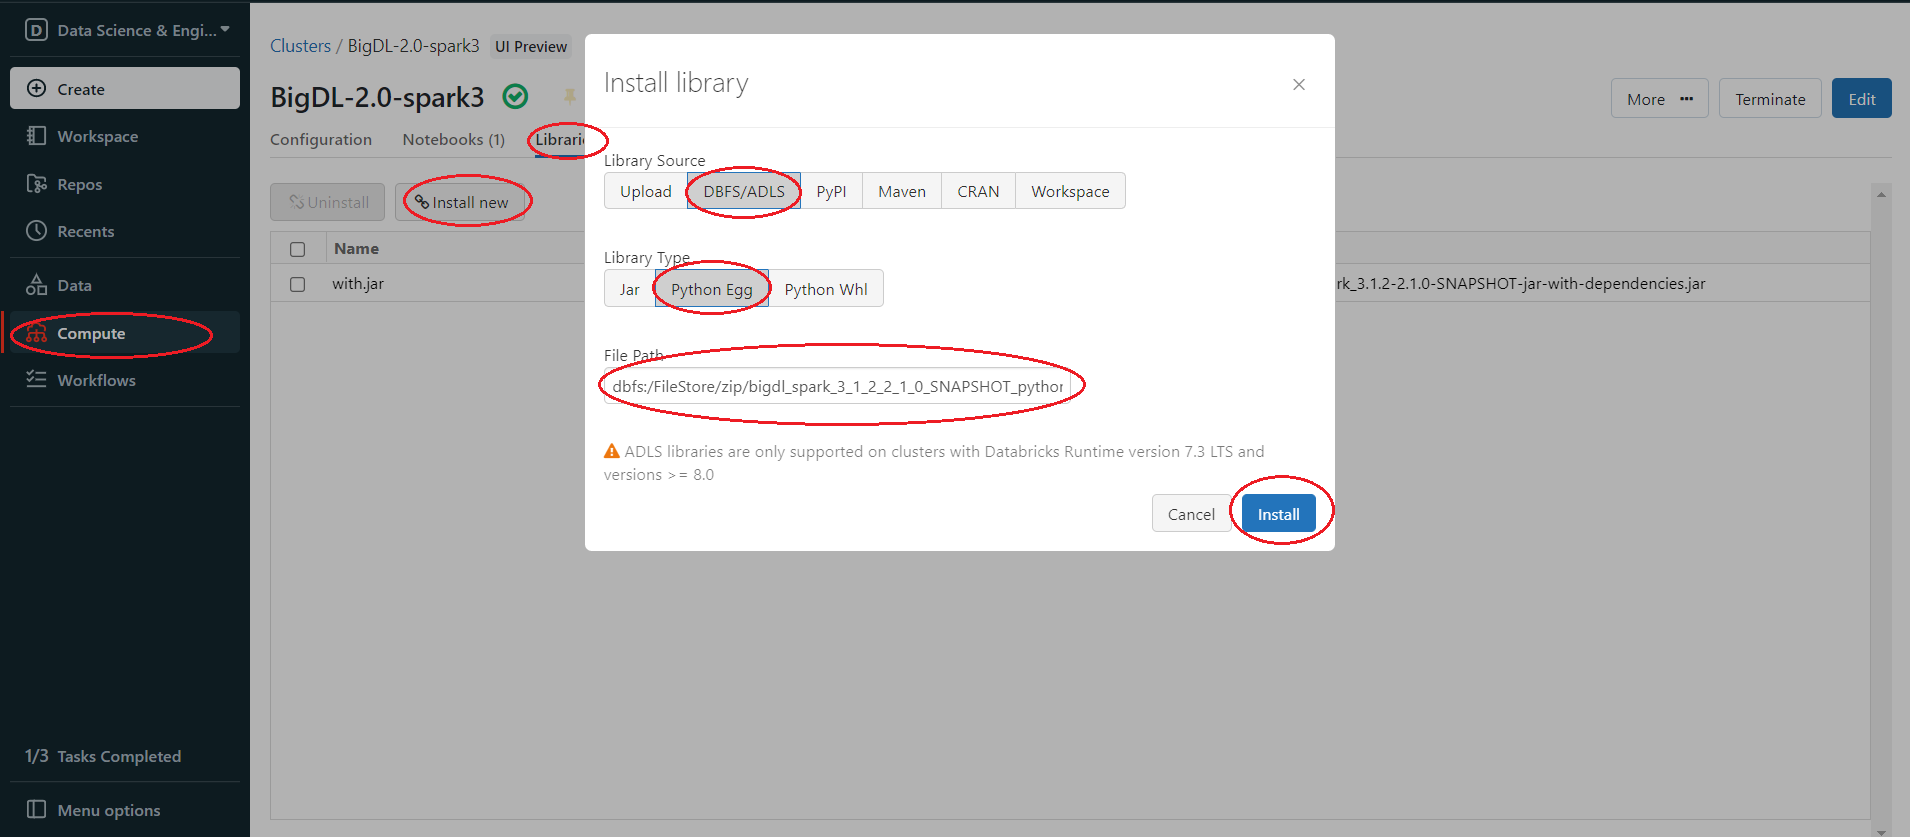
Then install the zip package from DBFS. In the left panel, click Compute > choose your cluster > Libraries > Install new > Library Source(DBFS/ADLS) > Library Type(Python Egg) > paste the path > Install
4.2 Change the File Extension Name
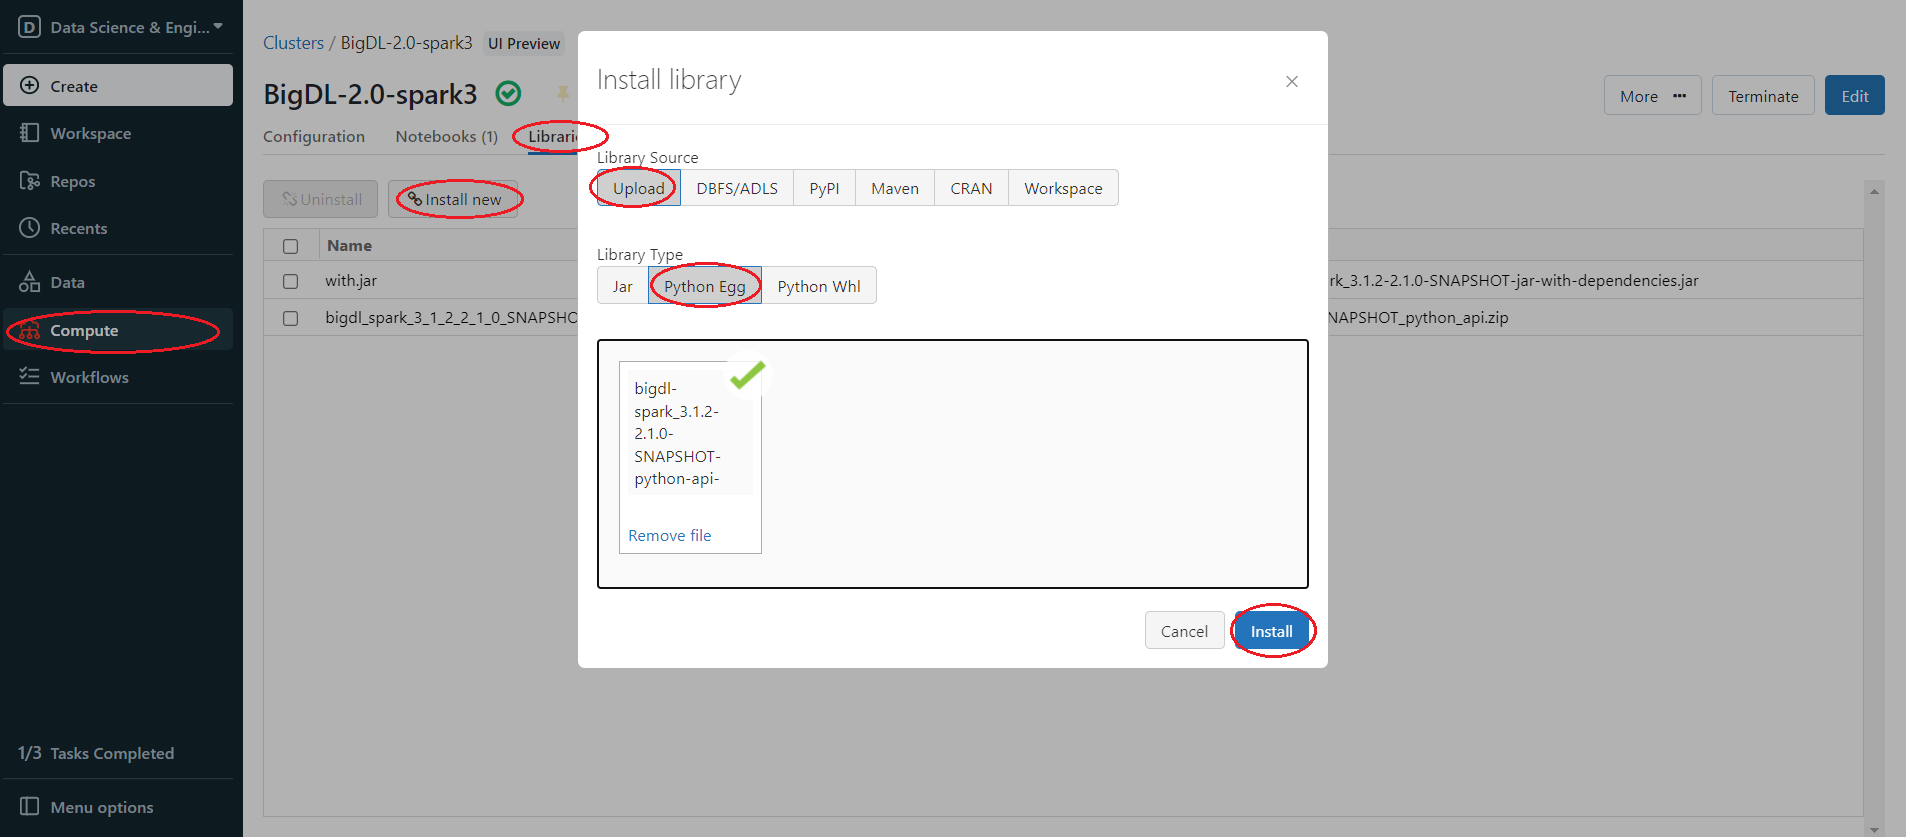
You can simply change the bigdl-spark_3.1.2-2.1.0-SNAPSHOT-python-api.zip extension name(.zip) to .egg, since Egg is essentially a zip format package. Then in the left panel, click Compute > choose your cluster > Libraries > Install new > Library Source(Upload) > Library Type(Python Egg) > Install
5. Set Spark configuration
On the cluster configuration page, click the Advanced Options toggle. Click the Spark tab. You can provide custom Spark configuration properties in a cluster configuration. Please set it according to your cluster resource and program needs.
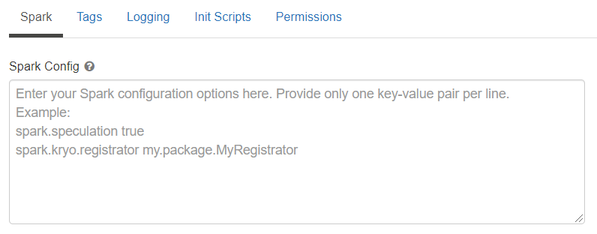
See below for an example of Spark config setting needed by BigDL. Here it sets 2 core per executor. Note that “spark.cores.max” needs to be properly set below.
spark.executor.cores 2
spark.cores.max 4
6. Run BigDL on Databricks
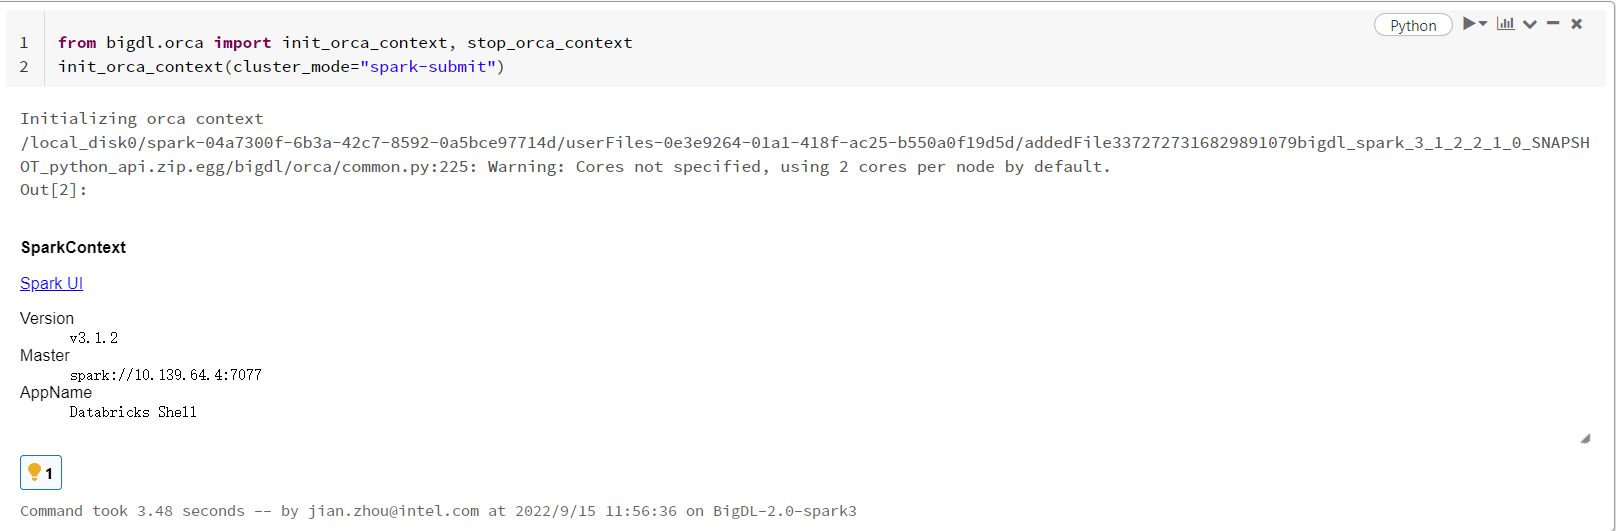
Open a new notebook, and call init_orca_context at the beginning of your code (with cluster_mode set to “spark-submit”).
from bigdl.orca import init_orca_context, stop_orca_context
init_orca_context(cluster_mode="spark-submit")
Output on Databricks:
7. Install other third-party libraries on Databricks if necessary
If you want to use other third-party libraries, check related Databricks documentation of libraries for AWS Databricks and libraries for Azure Databricks.
Appendix A
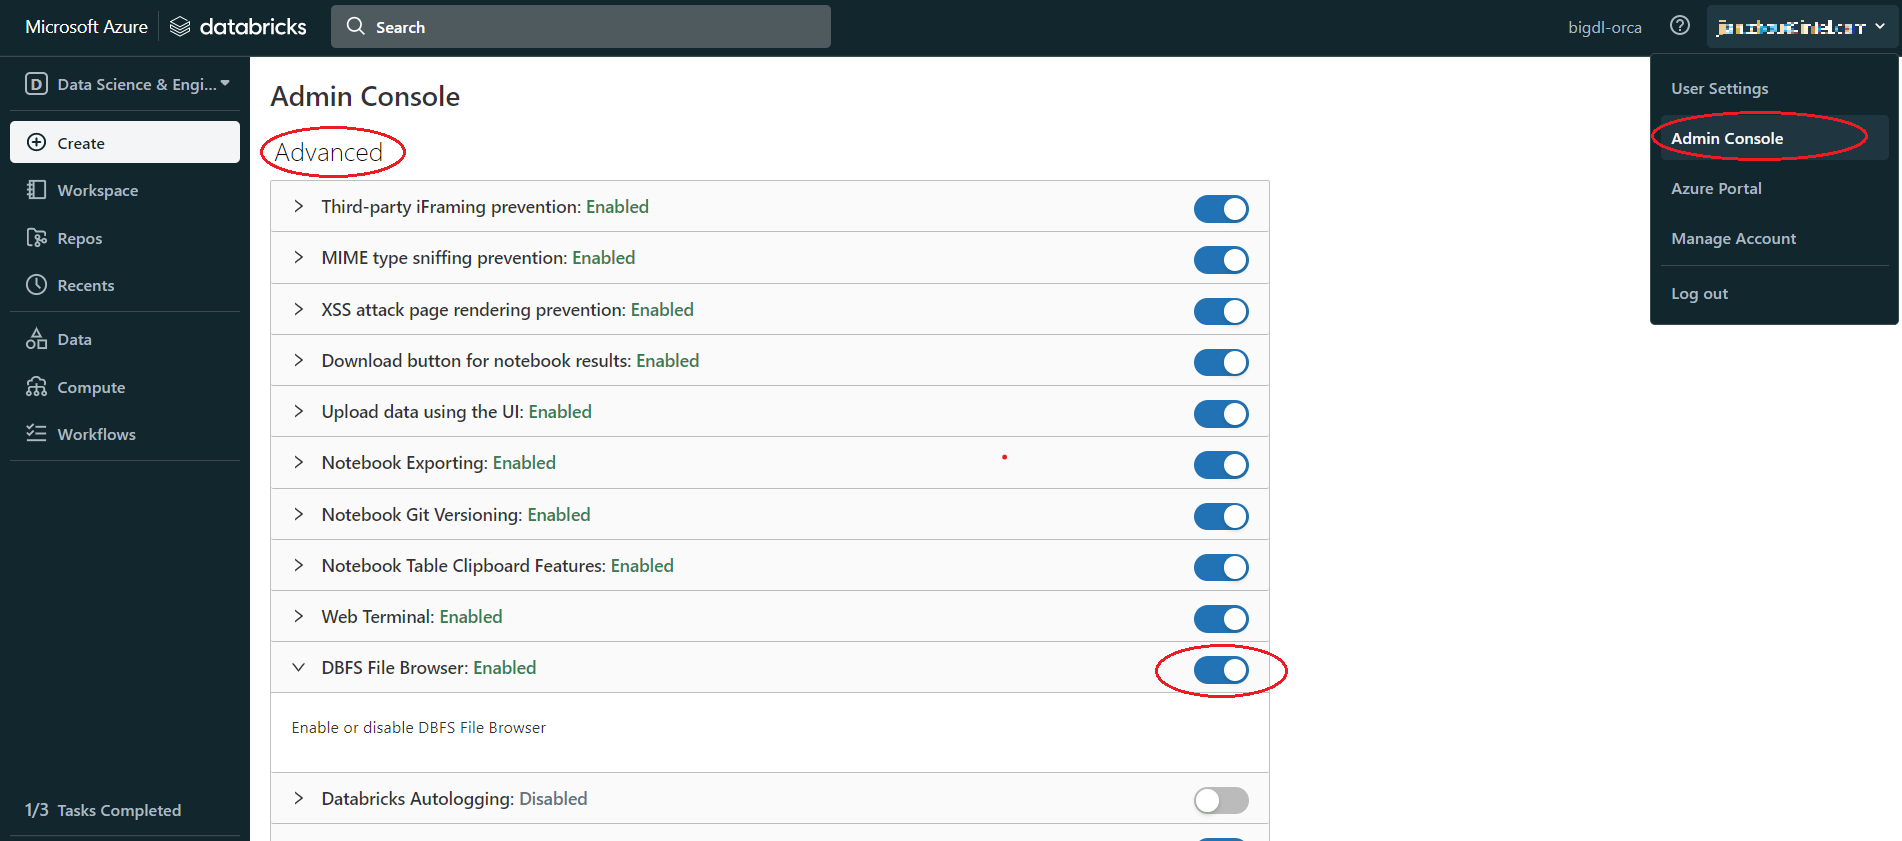
If there is no DBFS in your panel, go to User profile > Admin Console > Workspace settings > Advanced > Enabled DBFS File Browser
Appendix B
Use Databricks CLI to upload file to DBFS.
Install and config Azure Databricks CLI
Install Python, need Python version 2.7.9 and above if you’re using Python 2 or Python 3.6 and above if you’re using Python 3.
Run
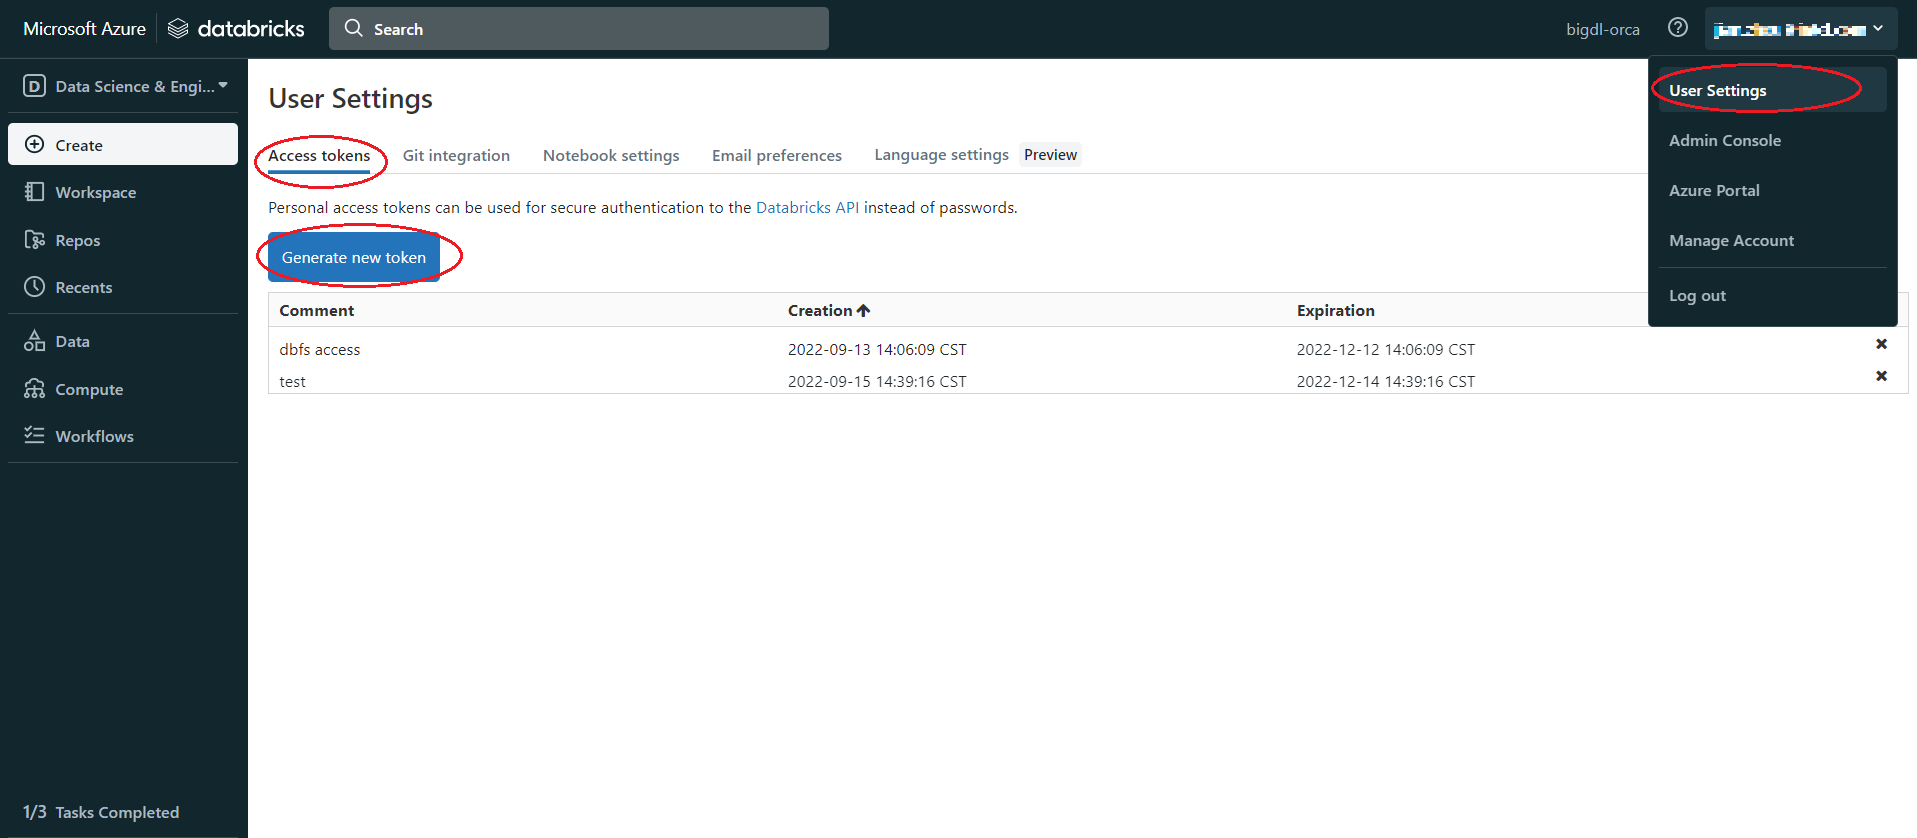
pip install databricks-cliSet authentication, Click user profile icon > User Settings > Access tokens > Generate new token > generate > copy the token, make sure to copy the token and store it in a secure location, it won’t show again.
Copy the URL of Databricks host, the format is
https://adb-<workspace-id>.<random-number>.azuredatabricks.net, you can copy it from your Databricks web page URL.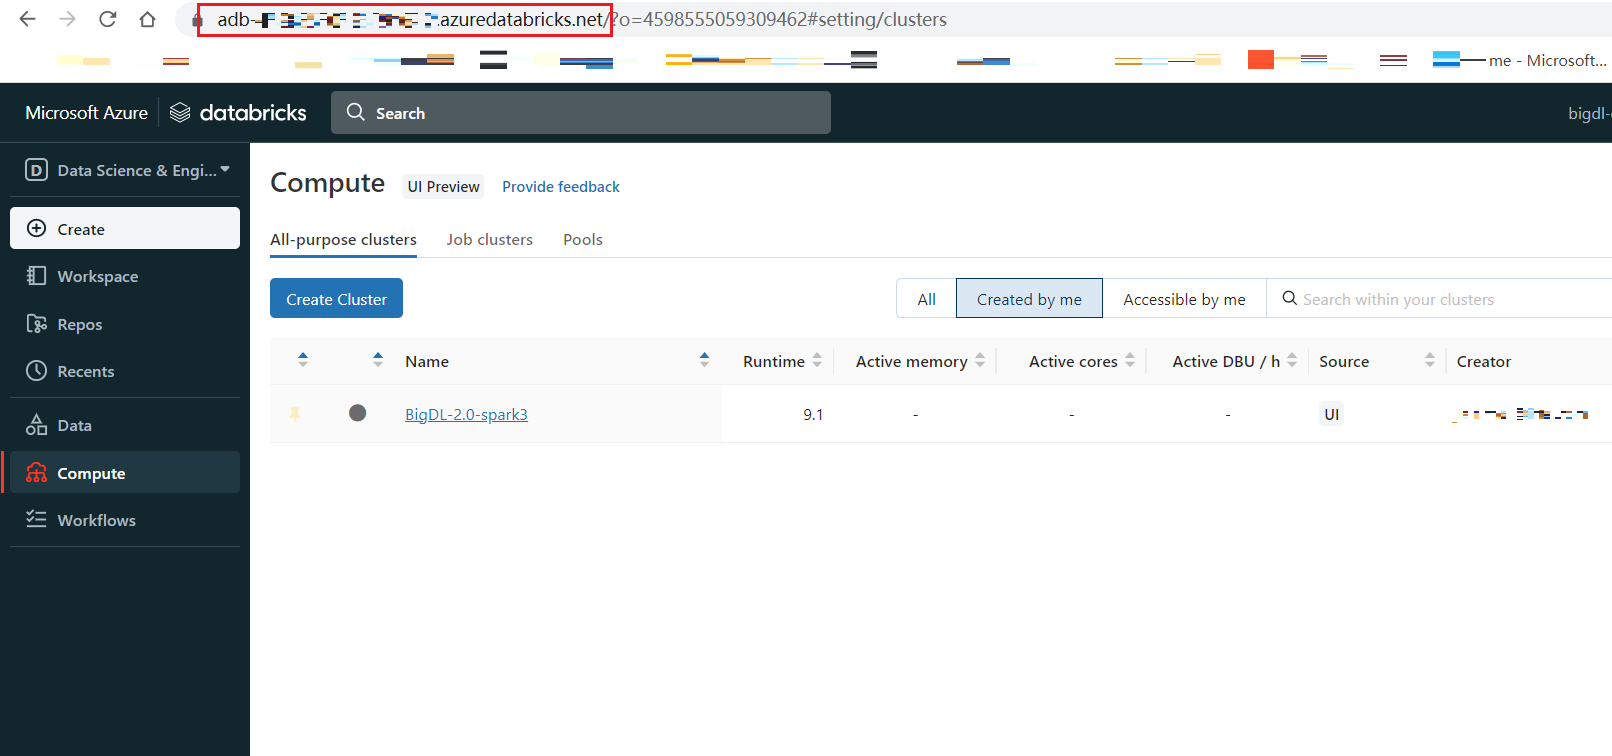
In cmd run
dbfs config --tokenas shown below:dbfs configure --token Databricks Host (should begin with https://): https://your.url.from.step.4 Token: your-token-from-step-3
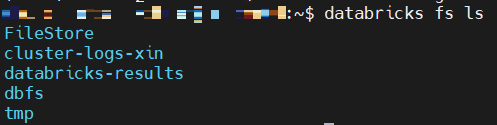
Verify whether you are able to connect to DBFS, run “databricks fs ls”.
Upload through Databricks CLI
Now, we can use Databricks CLI to upload file to DBFS. run command:
dbfs cp /your/local/filepath/bigdl-assembly-spark_3.1.2-2.1.0-SNAPSHOT-jar-with-dependencies.jar dbfs:/FileStore/jars/stable/bigdl-assembly-spark_3.1.2-2.1.0-SNAPSHOT-jar-with-dependencies.jar
After command finished, check DBFS in Databricks, in left panel, click Data > DBFS > your upload directory, if you do not see DBFS in your panel, see Appendix A.
Install package from DBFS
In the left panel, click Compute > choose your cluster > Libraries > Install new > Library Source(DBFS/ADLS) > Library Type(your package type).