AutoML#
Nano provides built-in AutoML support through hyperparameter optimization.
By simply changing imports, you are able to search the model architecture (e.g. by specifying search spaces in layer/activation/function arguments when defining the model), or the training procedure (e.g. by specifying search spaces in learning_rate or batch_size). You can simply use search on Model (for tensorflow) or on Trainier (for pytorch) to launch search trials, and search_summary to review the search results.
Under the hood, the objects (layers, activations, model, etc.) are implicitly turned into searchable objects at creation, which allows search spaces to be specified in their init arguments. Nano HPO collects those search spaces and passes them to the underlying HPO engine (i.e. Optuna) which generates hyperparameter suggestions accordingly. The instantiation and execution of the corresponding objects are delayed until the hyperparameter values are available in each trial.
Install#
If you have not installed BigDL-Nano, follow Nano Install Guide to install it according to your system and framework (i.e. tensorflow or pytorch).
Next, install a few dependencies required for Nano HPO using below commands.
pip install ConfigSpace
pip install optuna<=3.1.1
Search Spaces#
Search spaces are value range specifications that the search engine uses for sampling hyperparameters. The available search spaces in Nano HPO is defined in bigdl.nano.automl.hpo.space. Refer to [Search Space API doc]() for more details.
For Tensorflow Users#
Enable/Disable HPO for tensorflow#
For tensorflow training, you should call hpo_config.enable_hpo_tf before using Nano HPO.
hpo_config.enable_hpo_tf will dynamically add searchable layers, activations, functions, optimizers, etc into the bigdl.nano.tf module. When importing layers, you need to change the imports from tf.keras.layers to bigdl.nano.tf.keras.layers, so that you can specify search spaces in their init arguments. Note even if you don’t need to search the model architecture, you still need to change the imports to use HPO.
1import bigdl.nano.automl as nano_automl
2nano_automl.hpo_config.enable_hpo_tf()
To disable HPO, use hpo_config.disable_hpo_tf. This will remove the searchable objects from bigdl.nano.tf module.
1import bigdl.nano.automl as nano_automl
2nano_automl.hpo_config.disable_hpo_tf()
Search the Model Architecture#
To search different versions of your model, you can specify search spaces when defining the model using either sequential API, functional API or by subclassing tf.keras.Model.
using Sequential API#
You can specify search spaces in layer arguments. Note that search spaces can only be specified in key-word argument (which means Dense(space.Int(...)) should be changed to Dense(units=space.Int(...))). Remember to import Sequential from bigdl.nano.automl.tf.keras instead of tensorflow.keras
 1from bigdl.nano.tf.keras.layers import Dense, Conv2D, Flatten
 2from bigdl.nano.automl.tf.keras import Sequential
 3model = Sequential()
 4model.add(Conv2D(
 5    filters=space.Categorical(32, 64),
 6    kernel_size=space.Categorical(3, 5),
 7    strides=space.Categorical(1, 2),
 8    activation=space.Categorical("relu", "linear"),
 9    input_shape=input_shape))
10model.add(Flatten())
11model.add(Dense(10, activation="softmax"))
using Functional API#
You can specify search spaces in layer arguments. Note that if a layer is used more than once in the model, we strongly suggest you specify a prefix for each search space in such layers to distinguish them, or they will share the same search space (the last space will override all previous definition), as shown in the below example. Remember to import Model from bigdl.nano.automl.tf.keras instead of tensorflow.keras.
 1import bigdl.nano.automl.hpo.space as space
 2from bigdl.nano.tf.keras import Input
 3from bigdl.nano.tf.keras.layers import Dense, Dropout
 4from bigdl.nano.automl.tf.keras import Model
 5
 6inputs = Input(shape=(784,))
 7x = Dense(units=space.Categorical(8,16,prefix='dense_1'), activation="linear")(inputs)
 8x = Dense(units=space.Categorical(32,64,prefix='dense_2'), activation="tanh")(x)
 9x = Dropout(rate=space.Real(0.1,0.5, prefix='dropout'))(x)
10outputs = Dense(units=10)(x)
11model = Model(inputs=inputs, outputs=outputs, name="mnist_model")
by Subclassing tf.keras.Model#
For models defined by subclassing tf.keras.Model, use the decorator @hpo.tfmodel to turn the model into a searchable object. Then you will able to specify either search spaces or normal values in the model init arguments.
 1import bigdl.nano.automl.hpo.space as space
 2import bigdl.nano.automl.hpo as hpo
 3@hpo.tfmodel()
 4class MyModel(tf.keras.Model):
 5    def __init__(self, filters, kernel_size, strides, num_classes=10):
 6        super().__init__()
 7        self.conv1 = tf.keras.layers.Conv2D(filters=filters,
 8                            kernel_size=kernel_size,
 9                            strides=strides,
10                            activation="relu")
11        self.max1  = tf.keras.layers.MaxPooling2D(3)
12        self.bn1   = tf.keras.layers.BatchNormalization()
13
14        self.gap   = tf.keras.layers.GlobalAveragePooling2D()
15        self.dense = tf.keras.layers.Dense(num_classes)
16
17    def call(self, inputs, training=False):
18        x = self.conv1(inputs)
19        x = self.max1(x)
20        x = self.bn1(x)
21        x = self.gap(x)
22        return self.dense(x)
23
24model = MyModel(
25    filters=hpo.space.Categorical(32, 64),
26    kernel_size=hpo.space.Categorical(3, 5),
27    strides=hpo.space.Categorical(1, 2)
28)
Search the Learning Rate#
To search the learning rate, specify search space in learning_rate argument in the optimizer argument in model.compile. Remember to import the optimizer from bigdl.nano.tf.optimizers instead of tf.keras.optimizers.
1import bigdl.nano.automl.hpo.space as space
2from bigdl.nano.tf.optimizers import RMSprop
3model.compile(
4    loss=keras.losses.SparseCategoricalCrossentropy(from_logits=True),
5    optimizer=RMSprop(learning_rate=space.Real(0.0001, 0.01, log=True)),
6    metrics=["accuracy"],
7)
Search the Batch Size#
To search the batch size, specify search space in batch_size argument in model.search.
1import bigdl.nano.automl.hpo.space as space
2model.search(n_trials=2, target_metric='accuracy', direction="maximize",
3    x=x_train, y=y_train,validation_data=(x_valid, y_valid),
4    batch_size=space.Categorical(128,64))
Launch Hyperparameter Search and Review the Results#
To launch hyperparameter search, call model.search after compile, as shown below. model.search runs the n_trials number of trials (meaning n_trials set of hyperparameter combinations are searched), and optimizes the target_metric in the specified direction. Besides search arguments, you also need to specify fit arguments in model.search which will be used in the fitting process in each trial. Refer to [API docs]() for details.
Call model.search_summary to retrieve the search results, which you can use to get all trial statistics in pandas dataframe format, pick the best trial, or do visualizations. Examples of search results analysis and visualization can be found [here](#analysis-and-visualization).
Finally, model.fit will automatically fit the model using the best set of hyper parameters found in the search. You can also use the hyperparameters from a particular trial other than the best one. Refer to [API docs]() for details.
1model = ... # define the model
2model.compile(...)
3model.search(n_trials=100, target_metric='accuracy', direction="maximize",
4    x=x_train, y=y_train, batch_size=32, epochs=20, validation_split=0.2)
5study = model.search_summary()
6model.fit(...)
For PyTorch Users#
Nano-HPO now only supports hyperparameter search for [pytorch-lightning]() modules.
Search the Model Architecture#
To search the model architecture, use the decorator @hpo.plmodel() to turn the model into a searchable object. Put the arguments that you want to search in the init arguments and use the arguments to construct the model. The arguments can be either space or non-space values, as shown below.
 1import bigdl.nano.automl.hpo.space as space
 2import bigdl.nano.automl.hpo as hpo
 3
 4@hpo.plmodel()
 5class MyModel(pl.LightningModule):
 6    """Customized Model."""
 7    def __init__(self,out_dim1,out_dim2,dropout_1,dropout_2):
 8        super().__init__()
 9        layers = []
10        input_dim = 32
11        for out_dim, dropout in [(out_dim1, dropout_1),(out_dim2,dropout_2)]:
12            layers.append(torch.nn.Linear(input_dim, out_dim))
13            layers.append(torch.nn.Tanh())
14            layers.append(torch.nn.Dropout(dropout))
15            input_dim = out_dim
16        layers.append(torch.nn.Linear(input_dim, 2))
17        self.layers: torch.nn.Module = torch.nn.Sequential(*layers)
18        self.save_hyperparameters()
19    def forward(self, x):
20        return self.layers(x)
21
22model = MyModel(
23    out_dim1=space.Categorical(16,32),
24    out_dim2=space.Categorical(16,32),
25    dropout_1=space.Categorical(0.1, 0.2, 0.3, 0.4, 0.5),
26    dropout_2 = 0.5)
Search the Learning Rate#
learning_rate can be specified in the init arguments of your model. You can use learning_rate to construct the optimizer in configure_optimizers(), as shown below.
 1import bigdl.nano.automl.hpo.space as space
 2import bigdl.nano.automl.hpo as hpo
 3
 4@hpo.plmodel()
 5class MyModel(pl.LightningModule):
 6    def __init__(self, ..., learning_rate=0.1):
 7        ...
 8        self.save_hyperparameters()
 9    def configure_optimizers(self):
10        # set learning rate in the optimizer
11        self.optimizer = torch.optim.Adam(self.layers.parameters(),
12                                        lr=self.hparams.learning_rate)
13        return [self.optimizer], []
14model = MyModel(..., learning_rate=space.Real(0.001,0.01,log=True))
Search the Batch Size#
batch_size can be specified in the init arguments of your model. You can use the batch_size to construct the DataLoader in train_dataloader(), as shown below.
 1import bigdl.nano.automl.hpo.space as space
 2import bigdl.nano.automl.hpo as hpo
 3@hpo.plmodel()
 4class MyModel(pl.LightningModule):
 5    def __init__(self, ..., batch_size=16):
 6        ...
 7        self.save_hyperparameters()
 8    def train_dataloader(self):
 9        # set the batch size in train dataloader
10        return DataLoader(RandomDataset(32, 64),
11                        batch_size=self.hparams.batch_size)
12model = MyModel(..., batch_size = space.Categorical(32,64))
Launch Hyperparameter Search and Review the Results#
First of all, import Trainer from bigdl.nano.pytorch instead of pytorch_lightning. Remember to set use_hpo=True when initializing the Trainer.
To launch hyperparameter search, call Trainer.search after model is defined. Trainer.search takes the decorated model as input. Similar to tensorflow, trainer.search runs the n_trials number of trials (meaning n_trials set of hyperparameter combinations are searched), and optimizes the target_metric in the specified direction. There’s an extra argument max_epochs which is used only in the fitting process in search trials without affecting Trainer.fit. Trainer.search returns a model configured with the best set of hyper parameters.
Call Trainer.search_summary to retrieve the search results, which you can use to get all trial statistics in pandas dataframe format, pick the best trial, or do visualizations. Examples of search results analysis and visualization can be found [here](#analysis-and-visualization).
Finally you can use Trainer.fit() to fit the best model. You can also get a model constructed with hyperparameters from a particular trial other than the best one. Refer to [Trainer.search API doc]() for more details.
 1from bigdl.nano.pytorch import Trainer
 2model = MyModel(...)
 3trainer = Trainer(...,use_hpo=True)
 4best_model = trainer.search(
 5    model,
 6    target_metric='val_loss',
 7    direction='minimize',
 8    n_trials=100,
 9    max_epochs=20,
10)
11study = trainer.search_summary()
12trainer.fit(best_model)
Resume Search#
You can call search more than once with flag resume=True to resume from a previous search instead of starting a new one.
The _resumed_ search will take into consideration all trials in the previous search when sampling hyperparameters. The trials in the resumed search will be stored in the same repo as the first search, and all trials will be retrieved as a whole by search_summary.
Note that the flag resume is by default set to False, which means each search will by default start from scratch and any previous search results will be overridden and can no longer be retrieved.
Use a Persistent Storage#
By default, the storage used for storing trial info is created in-memory, so once the process is stopped the trial statistics can not be retrieved anymore. If you are expecting to run search for a long time and may resume search several times, it is highly recommended to use a persistent storage instead of the default in-memory storage.
To use a persistent storage, specify storage with an RDB url (e.g SQLlite, MySQL, etc.) in search. The simplest way is to specify a sqllite url, as shown in the example below. It will automatically create a db file in the specified path. Also specify study_name so that all the search with the same name will be gathered into the same repo.
Example#
name = "resume-example"
storage = "sqlite:///example.db"
#the first search from scratch
model.search(study_name=name, storage=storage,...)
# the resumed search
model.search(study_name=name, storage=storage, resume=True,...)
name = "resume-example"
storage = "sqlite:///example.db"
#the first search from scratch
trainer.search(study_name=name, storage=storage,...)
# the resumed search
trainer.search(study_name=name, storage=storage, resume=True,...)
If the model/trainer object is still accessible along the searches (e.g. in a running jupyter notebook), the specification of storage and study_name can be omitted. Simply call search with resume=True to resume search.
Parallel Search#
Parallel search allows trials to be run in multiple processes simultaneously. To use parallel search, you need to prepare an RDB database as storage. Then in search, specify the database url for storage, specify study_name, and set n_parallels to the number of parallel processes you want to run.
We do not recommend SQLite as storage for parallel search as it may cause deadlocks and performance issues. Here we provide an example using MySQL.
Setup MySQL database#
If you already know how to create a database in MySQL, you can skip this step. We assume MySQL service is already installed and started in your local machine.
Create a new file with name setup_db.sql, paste the below contents.
1CREATE DATABASE IF NOT EXISTS example;
2CREATE USER IF NOT EXISTS bigdlhpo ;
3GRANT ALL PRIVILEGEs ON example.* TO bigdlhpo;
4FLUSH PRIVILEGES;
Run below command
$ sudo mysql -u root < setup_db.sql
The above command creates a new user bigdlhpo and a new database example, and grants all access privileges on the example database to bigdlhpo.
Install MySQL client for python#
Install mysqlclient so that search can access MySQL databases from python.
pip install mysqlclient
Example#
In search, specify storage to the MySQL database example we just created as user bigdlhpo, specify study_name and also set n_parallels=8.
name = "parallel-example-tf"
storage = "mysql://bigdlhpo@localhost/example"
# the first search from scratch
model.search(study_name=name,
           storage=storage,
           n_parallels=8,
           ...)
name = "parallel-example-torch"
storage = "mysql://bigdlhpo@localhost/example"
#the first search from scratch
trainer.search(study_name=name,
           storage=storage,
           n_parallels=8,
           ...)
Analysis and Visualization#
The result of search_summary can be used for further analysis and visualization.
Get trial statistics as dataframe#
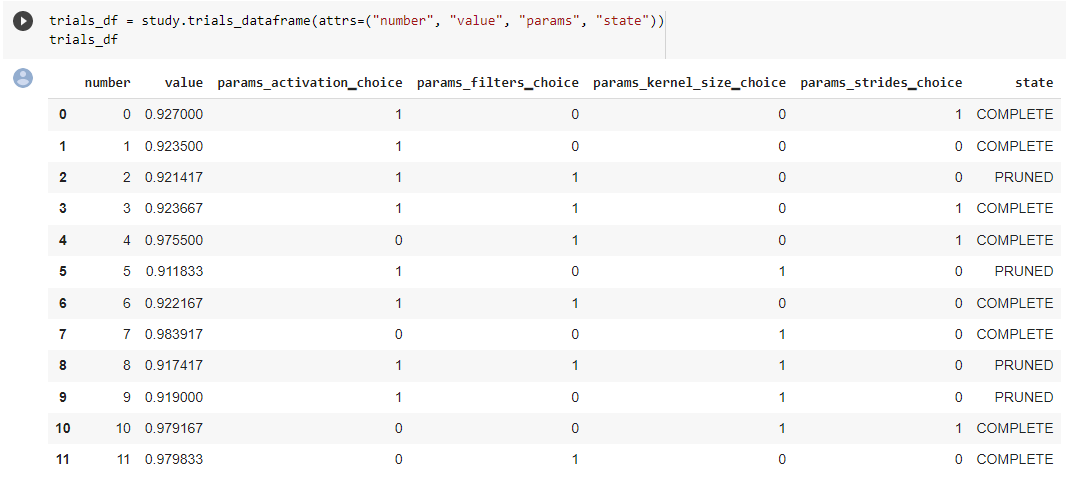
You can export the trial statistics as pandas dataframe, as shown below.
...
study = model.search_summary()
trials_df = study.trials_dataframe(attrs=("number", "value", "params", "state"))
...
study = trainer.search_summary()
trials_df = study.trials_dataframe(attrs=("number", "value", "params", "state"))
Below an example of the trials history we have exported as below.
Plot Hyperparamter Optimization History#
You can also plot the optimization history as shown below.
...
study = model.search_summary()

from bigdl.nano.automl.hpo.visualization import plot_optimization_history
plot1=plot_optimization_history(study)
...
study = trainer.search_summary()

from bigdl.nano.automl.hpo.visualization import plot_optimization_history
plot_optimization_history(study)
Example plot as below. It is an interactive chart which you can zoom-in and zoom-out and select data points.
Plot Intermediate Values#
You can also plot the intermediate values as shown below. This plot shows the metric result on each epoch/step of each trial, including pruned trials.
...
study = model.search_summary()

from bigdl.nano.automl.hpo.visualization import plot_intermediate_values
plot_intermediate_values(study)
...
study = trainer.search_summary()

from bigdl.nano.automl.hpo.visualization import plot_intermediate_values
plot_intermediate_values(study)
Example plot as below. It is an interactive chart which you can zoom-in and zoom-out and select data points.
Plot the Hyperparameters in Parallel Coordinates#
You can plot the hyperparamters in parallel coordinates chart.
...
study = model.search_summary()

from bigdl.nano.automl.hpo.visualization import plot_parallel_coordinate
plot_parallel_coordinate(study)
...
study = trainer.search_summary()

from bigdl.nano.automl.hpo.visualization import plot_parallel_coordinate
plot_parallel_coordinate(study)
Example plot as below. It is an interactive chart which you can zoom-in and zoom-out and select data points.
Plot the Hyperparameter Contour#
You can plot the hyperparameter contour chart.
...
study = model.search_summary()

from bigdl.nano.automl.hpo.visualization import plot_contour
plot_contour(study)
...
study = trainer.search_summary()

from bigdl.nano.automl.hpo.visualization import plot_contour
plot_contour(study)
Example plot as below. It is an interactive chart which you can zoom-in and zoom-out and select data points.
Inspect Hyperparameter Importance by accuracy#
You can plot the hyperparameter importance according to their relationship to accuracy.
...
study = model.search_summary()

from bigdl.nano.automl.hpo.visualization import plot_param_importances
plot_param_importances(study)
...
study = trainer.search_summary()

from bigdl.nano.automl.hpo.visualization import plot_param_importances
plot_param_importances(study)
Example plot as below. It is an interactive chart which you can zoom-in and zoom-out and select data points.
Inspect Hyperparameter Importance by latency#
You can plot the hyperparameter importance according to their relationship to latency.
...
study = model.search_summary()

from bigdl.nano.automl.hpo.visualization import plot_param_importances
plot_param_importances(study, target=lambda t: t.duration.total_seconds(), target_name="duration")
...
study = trainer.search_summary()

from bigdl.nano.automl.hpo.visualization import plot_param_importances
plot_param_importances(study, target=lambda t: t.duration.total_seconds(), target_name="duration")
Example plot as below. It is an interactive chart which you can zoom-in and zoom-out and select data points.