Install BigDL-LLM in Docker on Windows with Intel GPU#
This guide demonstrates how to install BigDL-LLM in Docker on Windows with Intel GPUs.
It applies to Intel Core Core 12 - 14 gen integrated GPUs (iGPUs) and Intel Arc Series GPU.
Note:
WSL2 support is required during the installation process.
This installation method requires at least 35GB of free disk space on C drive.
Install Docker on Windows#
Getting Started with Docker:
For New Users:
Begin by visiting the official Docker Get Started page for a comprehensive introduction and installation guide.
Detailed installation instructions for Windows, including steps for enabling WSL2, can be found on the Docker Desktop for Windows installation page.
Detailed installation Steps for Windows Users:
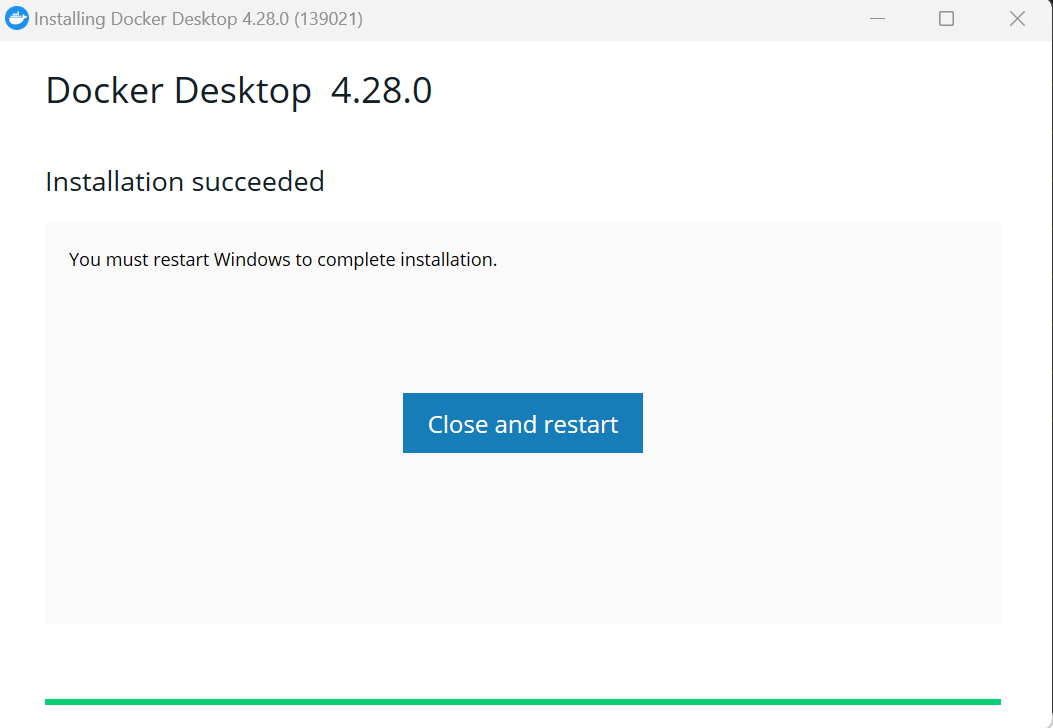
Download and install Docker Desktop for Windows: The installation could take around 5 minutes, and a reboot will be required after installation.


Install WSL2: Open PowerShell or Windows Command Prompt in administrator mode by right-clicking and selecting “Run as administrator”, enter:
wsl --install
The installation could take around 5 minutes. Then restart your machine and open PowerShell or Windows Command Prompt, enter
wsl --list:You can see the similar result like this:
C:\Users\arda>wsl --list
* Ubuntu
docker-desktop-data
docker-desktop
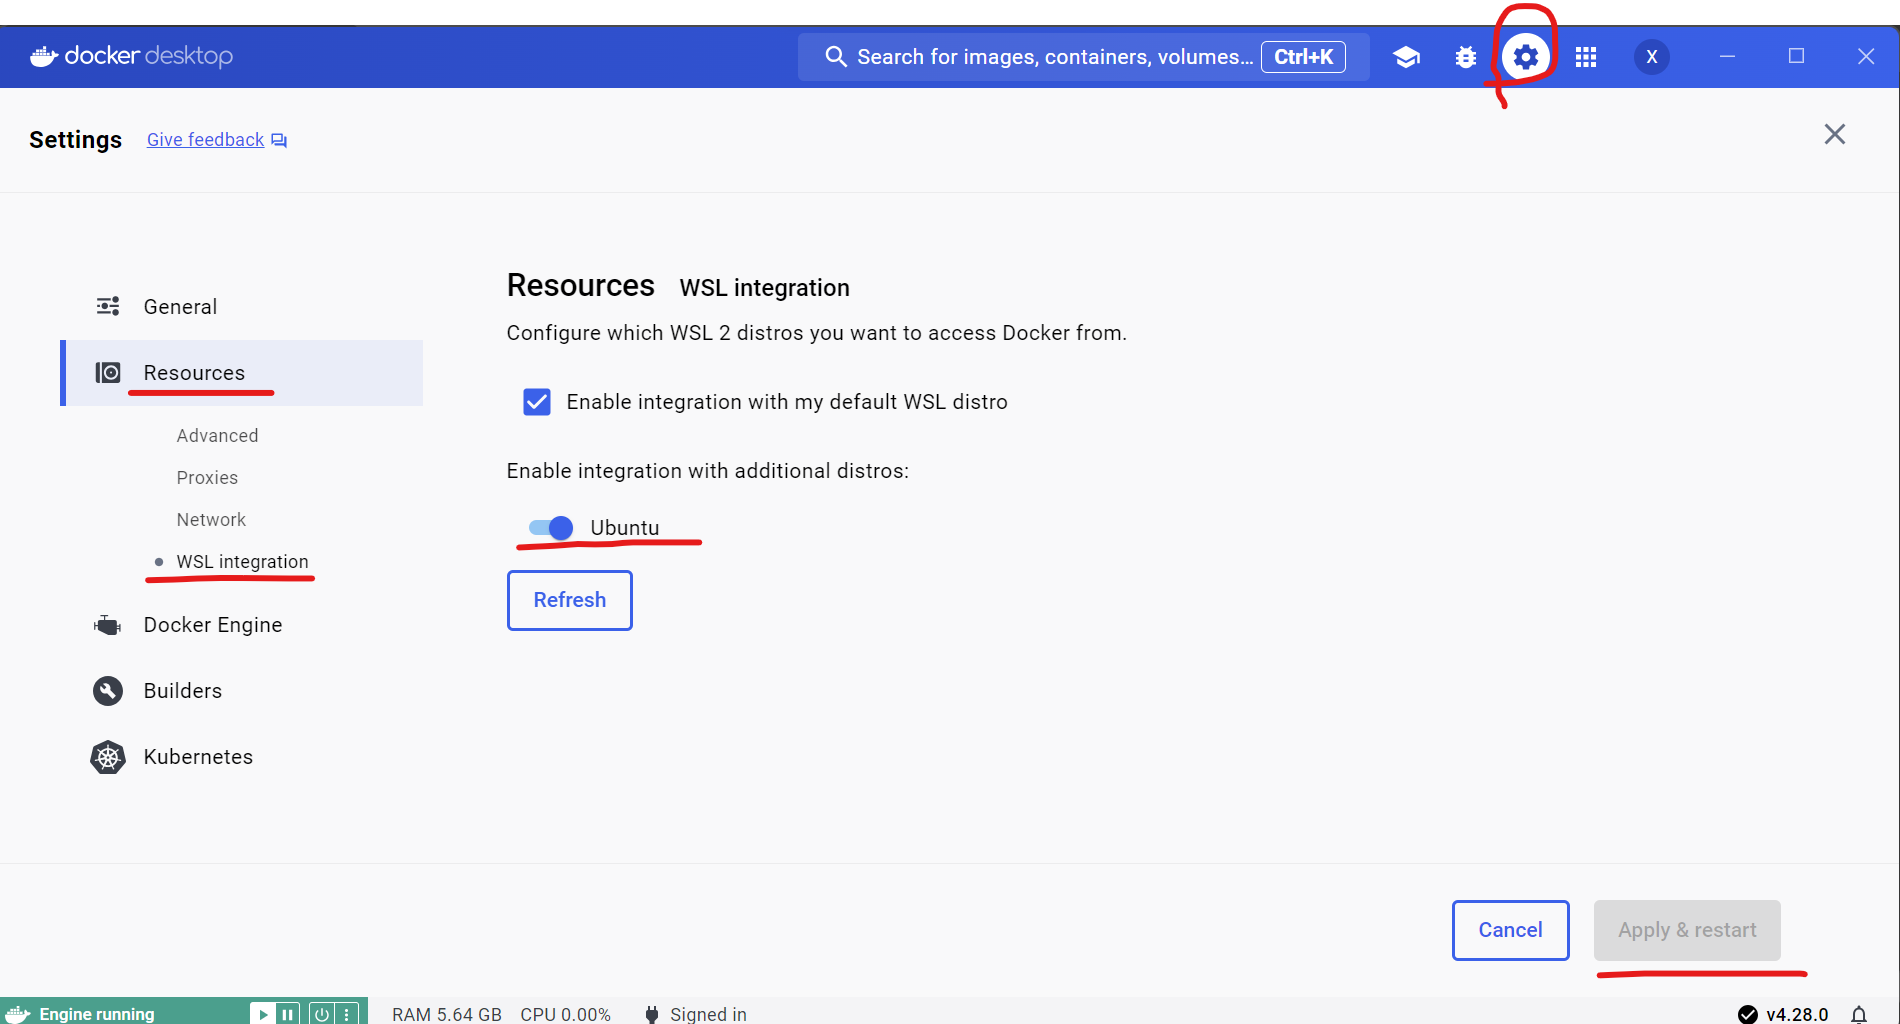
Enable integration with WSL2 in Docker desktop: Open Docker desktop and click
Settings->Resources->WSL integration->turn onUbuntubutton->Apply & restart.
Note: If you encounter Docker Engine stopped when opening Docker Desktop, you can reopen it in administrator mode.
Check Docker is enabled in WSL2: Enter
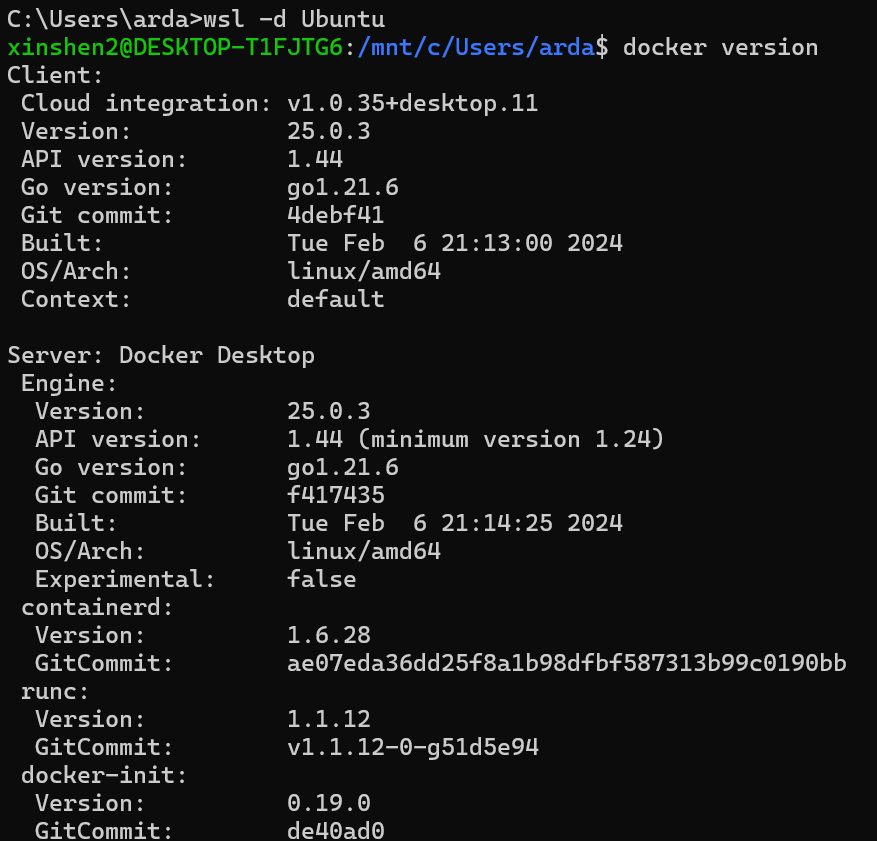
wsl -d Ubuntuin PowerShell or Windows Command Prompt to run the Ubuntu wsl distribution. Then enterdocker versionto check if docker could be used in WSL. You can see the similar result like this:
Note: During the use of Docker in WSL, Docker Desktop needs to be kept open all the time.
BigDL LLM Inference with XPU on Windows#
1. Prepare bigdl-llm-xpu Docker Image#
Run the following command in WSL:
docker pull intelanalytics/bigdl-llm-xpu:2.5.0-SNAPSHOT
This step will take around 20 minutes depending on your network.
2. Start bigdl-llm-xpu Docker Container#
To map the xpu into the container, an example (docker_setup.sh) could be:
#/bin/bash
export DOCKER_IMAGE=intelanalytics/bigdl-llm-xpu:2.5.0-SNAPSHOT
export CONTAINER_NAME=my_container
export MODEL_PATH=/llm/models[change to your model path]

sudo docker run -itd \
        --net=host \
        --privileged \
        --device /dev/dri \
        --memory="32G" \
        --name=$CONTAINER_NAME \
        --shm-size="16g" \
        -v $MODEL_PATH:/llm/llm-models \
        -v /usr/lib/wsl:/usr/lib/wsl \
        $DOCKER_IMAGE
Then run this bash in WSL:
./docker_setup.sh
After the container is booted, you could get into the container through docker exec.
export CONTAINER_NAME=my_container
docker exec -it $CONTAINER_NAME bash
 To verify the device is successfully mapped into the container, run `sycl-ls` in the docker container to check the result. In a machine with iGPU (Intel(R) UHD Graphics 770), the sampled output is:
root@docker-desktop:/# sycl-ls
[opencl:acc:0] Intel(R) FPGA Emulation Platform for OpenCL(TM), Intel(R) FPGA Emulation Device OpenCL 1.2  [2023.16.12.0.12_195853.xmain-hotfix]
[opencl:cpu:1] Intel(R) OpenCL, Intel(R) Core(TM) i7-14700K OpenCL 3.0 (Build 0) [2023.16.12.0.12_195853.xmain-hotfix]
[opencl:gpu:2] Intel(R) OpenCL Graphics, Intel(R) Graphics [0xa780] OpenCL 3.0 NEO  [23.35.27191.42]
[ext_oneapi_level_zero:gpu:0] Intel(R) Level-Zero, Intel(R) Graphics [0xa780] 1.3 [1.3.26241]
Note: If you want to exit this Docker container, you can enter
exit, which will exit the container and return to WSL. You can usedocker psto check that the container created in this case will still be running. If you want to enter this container again, you can typedocker exec -it $CONTAINER_NAME bashagain in WSL.

3. Start Inference#
Chat Interface: Use chat.py for conversational AI. For example, enter below command in docker container:
cd /llm
python chat.py --model-path /llm/llm-models/chatglm2-6b
The output is similar like this:
Human: What is AI?
BigDL-LLM:
AI, or Artificial Intelligence, refers to the development of computer systems or machines that can perform tasks that typically require human intelligence. These systems are designed to learn from data and make decisions, or take actions, based on that data.
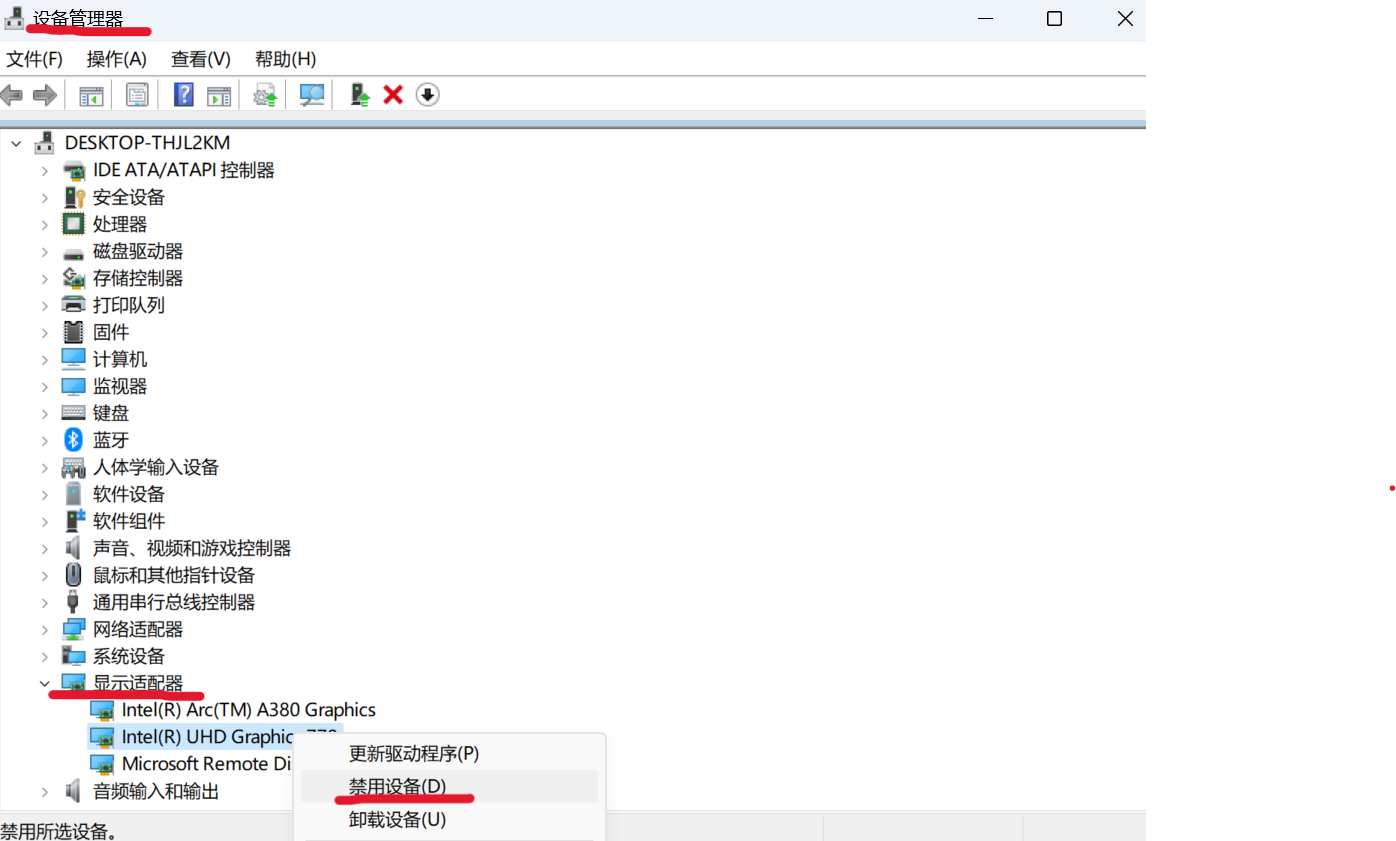
If your machine has both an integrated GPU (iGPU) and a dedicated GPU (dGPU) like ARC, you may encounter the following issue:
Abort was called at 62 line in file:
./shared/source/os_interface/os_interface.h
LIBXSMM_VERSION: main_stable-1.17-3651 (25693763)
LIBXSMM_TARGET: adl [Intel(R) Core(TM) i7-14700K]
Registry and code: 13 MB
Command: python chat.py --model-path /llm/llm-models/chatglm2-6b/
Uptime: 29.349235 s
Aborted
Disabling the iGPU in Device Manager can resolve this problem.
